Showing posts with label BBQ. Show all posts

Tuesday, February 12, 2013

BBQ Pork (or Chicken) Leftover Edition: Crescent Rolls!

Wondering what to do leftover shredded BBQ pork or chicken? Try these delicious BBQ stuffed crescent rolls!


Ingredients:

One 8 oz. can (tin? Roll? I don’t know what to call those things) of Pillsbury Crescent Rolls
Eight heaping spoonfuls of cold, shredded pork or chicken, with BBQ sauce

Directions:

1.    Preheat oven 375.
2.    Separate dough into triangles. Place spoonful of shredded pork or chicken at base of triangle, like so:


3.    Wrap dough around meat:


4.    Bake for 10-12 minutes, and enjoy!

Greek Yogurt Marinated Beer Can Chicken

Greek yogurt is a perfect marinade for chicken. Not only does it add great flavor, but it tenderizes the meat. The results are delicious.
So in my ongoing quest to find as many different ways to make beer can chicken as possible, I present to you: Greek Yogurt Marinated Beer Can Chicken.


Ingredients:

1 whole chicken
Salt
Pepper

Marinade:

1 cup Greek yogurt
1 tsp each: salt, pepper, oregano
1 tbsp: olive oil, lemon juice

Directions:

1.    Combine all marinade ingredients and stir.
2.    Remove chicken neck and giblets, rinse the chicken inside and out, and pat dry with paper towels.
3.    Coat chicken with marinade, cover and refrigerate overnight.


4.    Fill your chimney starter with charcoal and light. Soak some wood chunks or chips.
5.    While your coals are getting hot, drink half a can of beer (soda is fine too).
6.    Set up your grill for indirect cooking, with the coals and wood chunks in a ring along the outer edge of the grill, with the drip pan in the center.


7.    Remove chicken from marinade, and wipe off excess. Shove can with remaining beer into the cavity of the chicken, and place on the grill above the drip pan. Use the legs and the can to form a tripod to hold the chicken upright.


(Oh yes, that's right. Mrs. Grill That got me a beer can chicken holder for Christmas. It is awesome. You should get one too: Sur La Table Chicken Roaster (Google Affiliate Ad). Product placement!

8.    Place the lid on the grill. Smoke, covered, for approximately one hour and fifteen minutes. The chicken is ready with the temperature reaches 165 degrees in the breast and 180 degrees in the thigh. Juices should run clear and skin will be nice and crispy.


9.    Let chicken rest at least 10-15 minutes before carving.

If you like this recipe, please be sure to click on the links below to share it - and don’t forget to follow @youcangrillthat on Twitter!


Sunday, January 6, 2013

Pulled Pork Leftovers – Nachos!

Looking for something fun to do with leftover pulled pork? Make some nachos! These are guaranteed to be a huge hit at your next party.


There’s no recipe here; just get some tortilla chips and top with pulled pork and anything else you want on your nachos – salsa (here’s a great recipe using grilled corn), black beans, sour cream, cheese of course (you can really step it a notch with this recipe for queso blanco), etc. Get creative and enjoy.

Monday, December 3, 2012

Cherry Cola BBQ Sauce


One of the great things about barbecue, and especially barbecue sauce, is that there are seemingly infinite different options. I love experimenting with different sauces and getting completely different flavors, all of which still count as “barbecue sauce.”

My latest creation is a cherry barbecue sauce, flavored with cherry cola and cherry preserves in addition to the usual suspects (like ketchup and apple cider vinegar). It combines sweet and a little heat, with a cool kick from the cherry flavor. Give it a try, and let me know what you think!

Ingredients:

½ stick butter
1 cup ketchup
1 can cherry cola
3 tablespoons cherry preserves
½ cup cider vinegar
¼ cup Worcestershire sauce
½ cup brown sugar
½ teaspoon each of the following: salt, black pepper, garlic powder, onion salt, ground red pepper (add more or less depending on your taste)
2 TBSP lemon juice

Directions:

1.    Melt butter in saucepan over medium heat.
2.     Stir in all other ingredients.
3.    Simmer 30-40 minutes, until reduced. Enjoy!

Goes great with any of these grilling recipes!


Be sure to try these other sauces to compare and find your favorite:


If you like this recipe, please be sure to click on the links below to share it! And don’t forget to follow @youcangrillthat on Twitter!   

Thursday, November 15, 2012

Dry Rub BBQ Beer Can Chicken

In my ongoing quest to grill as many different varieties of beer can chicken as possible, I realized that I haven’t really done a classic barbeque dry rub. This recipe is great on its own or with BBQ sauce (like my favorite Dr. Pepper sauce).

Ingredients:

1 whole chicken (about 4.5 pounds)
Approximately one tablespoon vegetable oil
Salt and pepper

Dry rub ingredients (these are all approximate. Add more or less of each to get the flavor you want):

2 tablespoons brown sugar
1 tablespoon salt
1 tablespoon pepper
1 tablespoon paprika
1 teaspoon garlic powder
1 teaspoon onion salt
1 teaspoon ground red pepper

Directions:

1.    In a small bowl, mix all dry rub ingredients.
2.    Remove chicken neck and giblets (I try to freeze them to save for stocks). Rinse the chicken inside and out, and pat dry with paper towels.
3.    Coat chicken with vegetable oil, and sprinkle with salt and pepper. Then cover with dry rub.

 
4.    Fill your chimney starter with charcoal and light. Soak some wood chunks or chips.
5.    While your coals are getting hot, drink half a can of beer (soda is fine too).
6.    Set up your grill for indirect cooking, with all of the coals and wood chunks on one side, and a drip pan on the other. Or, place the coals in a ring along the outer edge of the grill, with the drip pan in the center.

 
7.    Shove can with remaining beer into the cavity of the chicken, and place on the grill above the drip pan. Use the legs and the can to form a tripod to hold the chicken upright.

 
8.    Place the lid on the grill. Smoke, covered, for approximately one hour and fifteen minutes. The chicken is ready with the temperature reaches 165 degrees in the breast and 180 degrees in the thigh. Juices should run clear and skin will be nice and crispy.
9.    Let chicken rest at least 10-15 minutes before carving.

If you like this recipe, please be sure to click on the links below to share it - and don’t forget to follow @youcangrillthat on Twitter!

Tuesday, September 18, 2012

How to Smoke a Turkey Breast on the Grill

Looking for a slice of Thanksgiving any time of the year, in less than two hours?

Cooking a whole turkey is an ordeal. There’s a lot of prep work, it takes days to thaw (while it consumes your entire refrigerator), and then it takes hours to cook. Done right, it’s delicious and totally worth the effort. But still, an ordeal.

A turkey breast, on the other hand, thaws overnight, doesn’t take up too much fridge space, and can be smoked in less than two hours (just enough time to make corn bread dressing while it smokes, but that’s a recipe for another day . . . stay tuned).

With just a little prep work, you can have a moist, juicy, flavorful smoked turkey any day of the year – give it a shot!


Ingredients:

1 turkey breast (about 4-5 pounds)
2 tablespoons butter

Brine ingredients:

Water (about 2 quarts – enough to cover the whole breast)
½ cup salt
½ cup brown sugar
¼ cup lemon juice (or two lemons, cut in half and squeezed)
1 tablespoon dried rosemary (or 2 sprigs fresh rosemary)
1 tablespoon dried thyme (or 2 sprigs fresh)

Rub ingredients:

1 teaspoon salt
1 teaspoon pepper
½ teaspoon paprika
½ teaspoon herbed poultry seasoning

Directions:

1.    The night before you’re planning to smoke the turkey, mix the brining ingredients in a large bowl and submerge the turkey. Cover and refrigerate overnight.
2.    When you’re ready to cook, fill a chimney starter with charcoal and begin to heat the coals. Soak wood chunks in water.
3.    While the charcoal is getting hot, prep the turkey. Remove it from the brine, and discard solution. Pat the turkey dry. Rub it with the butter, then sprinkle generously with salt, pepper, herbed poultry seasoning and paprika (feel free to mix up the spices to get the flavor you want).
4.    When the coals are ready, set up your grill for indirect heat (like you would for BBQ pork shoulder). Place charcoal on one side of the grill. Place a drip pan on the other side, next to the goals. Place soaked wood chunks directly on the charcoal, then add the grill grate.
5.    Place the turkey above the drip pan, on the opposite side of the grill from the charcoal and wood. Cover the grill, with the holes in the lid directly above the turkey.


6.    Smoke turkey, covered, for 40 minutes. Rotate the turkey 180 degrees, add newly soaked wood chunks, and recover.
7.    Smoke turkey another 40 minutes. Rotate turkey again, add more wood chunks, and insert a meat thermometer into the thickest part of the breast, not touching the bone.
8.    Continue smoking turkey until it reaches an internal temperature of 165 degrees. Remove turkey from the grill. Let rest for 15 minutes before carving. Enjoy!


If you like this recipe, please be sure to click on the links below to share it! And don’t forget to follow @youcangrillthat on Twitter!

Monday, July 16, 2012

BBQ Beef Brisket – Smoked on the Grill

Looking for smoky, moist, tender, flavorful beef brisket on the grill? Give this recipe a shot. Remember the key – low and slow!


How to buy beef brisket: When you’re buying brisket, you have a few different options. You can get a whole brisket (or “packer cut”), which is boneless and cut from the breast section of a side of beef. Since each cow produces two whole briskets, this is a huge piece of meat. It consists of a “flat” section, and a “point” section, and you can also purchase those separately. The flat section is basically just a lean, flat cut of beef. This is what you usually see sliced when you order beef brisket. The point section is a much fattier, so it has a lot of flavor and moisture, but it also falls apart easily, so it’s usually chopped or used for burnt ends.

If you go with the whole brisket, be prepared to smoke it for a good 15 hours. That’s an awesome way to spend the day, but you probably won’t be able to find a whole brisket at your local grocery store. They probably won’t have the point section either, but it shouldn’t be too hard to find a flat cut, which is what this recipe calls for. Look to buy a flat cut that has a layer of between a quarter-inch and a half-inch. If it’s more than a half-inch, trim it a little bit. If it’s less than a quarter inch, keep looking for a better cut!

Ingredients:

One beef brisket, flat cut, 5-6 pounds
2 tablespoons olive oil
1 cup apple cider vinegar
¼ cup canola oil
¼ cup Worcestershire sauce

Dry rub ingredients:

½ cup brown sugar
¼ cup salt
¼ black pepper
¼ paprika
2 tablespoons onion salt
 2 tablespoons garlic powder
2 tablespoons chili powder

Directions:

1.    Combine all dry rub ingredients in a medium sized bowl. Set aside two tablespoons of the dry rub mix.
2.    Brush brisket with the olive oil, then coat generously with the dry rub. Refrigerate at least two hours; overnight is preferable.


3.    One hour before you’re ready to cook, take the brisket out of the fridge. Start soaking your wood chunks in water so they’ll be ready to go.
4.    Fill a chimney starter about halfway with charcoal and heat. Once the coals are gray, pour them onto one side of the grill, so you’re set up for indirect heat. Place a drip pan on the other side of the grill.
5.    Use a thermometer to monitor the grill temperature carefully. You want to keep the temperature between 225 degrees and 250 degrees.
6.    When the grill has reached the target temperature, place the wood chunks on top of the coals. Place the brisket, fat-side up, above the drip pan.


7.    Grill, covered, For the first two hours, add more wood chunks approximately every 30 minutes to keep the smoke going.
8.    Mix the cider vinegar, oil, Worcestershire sauce, and reserved two tablespoons of the dry rub mix together.
9.    After two hours, pour the cider vinegar mixture into a grill-safe pan. Remove the brisket carefully from the grill, and place it in the pan, like so:


10.     Cover immediately with foil, and continue cooking over indirect heat.
11.    Cook for about 3-4 more hours, continuing to monitor the temperature of the grill carefully. Add more charcoal as needed. Be sure to only add hot coals in order to maintain a steady temperature. TIP: I found it works best to add about 8 hot coals (heated in the chimney starter) approximately every hour.
12.    When the meat reaches an internal temperature of 200 degrees, it’s ready to go. Remove the pan from the grill, then remove the brisket from the pan and the vinegar mixture. Place on a cutting board and cover with foil.
13.    Let the brisket rest for 15-20 minutes. Then slice across the grain – this is important for breaking apart the fibers that run through the brisket. You don’t want to spend all day slowly smoking this brisket only to render it tough and hard to eat because you sliced it the wrong way.


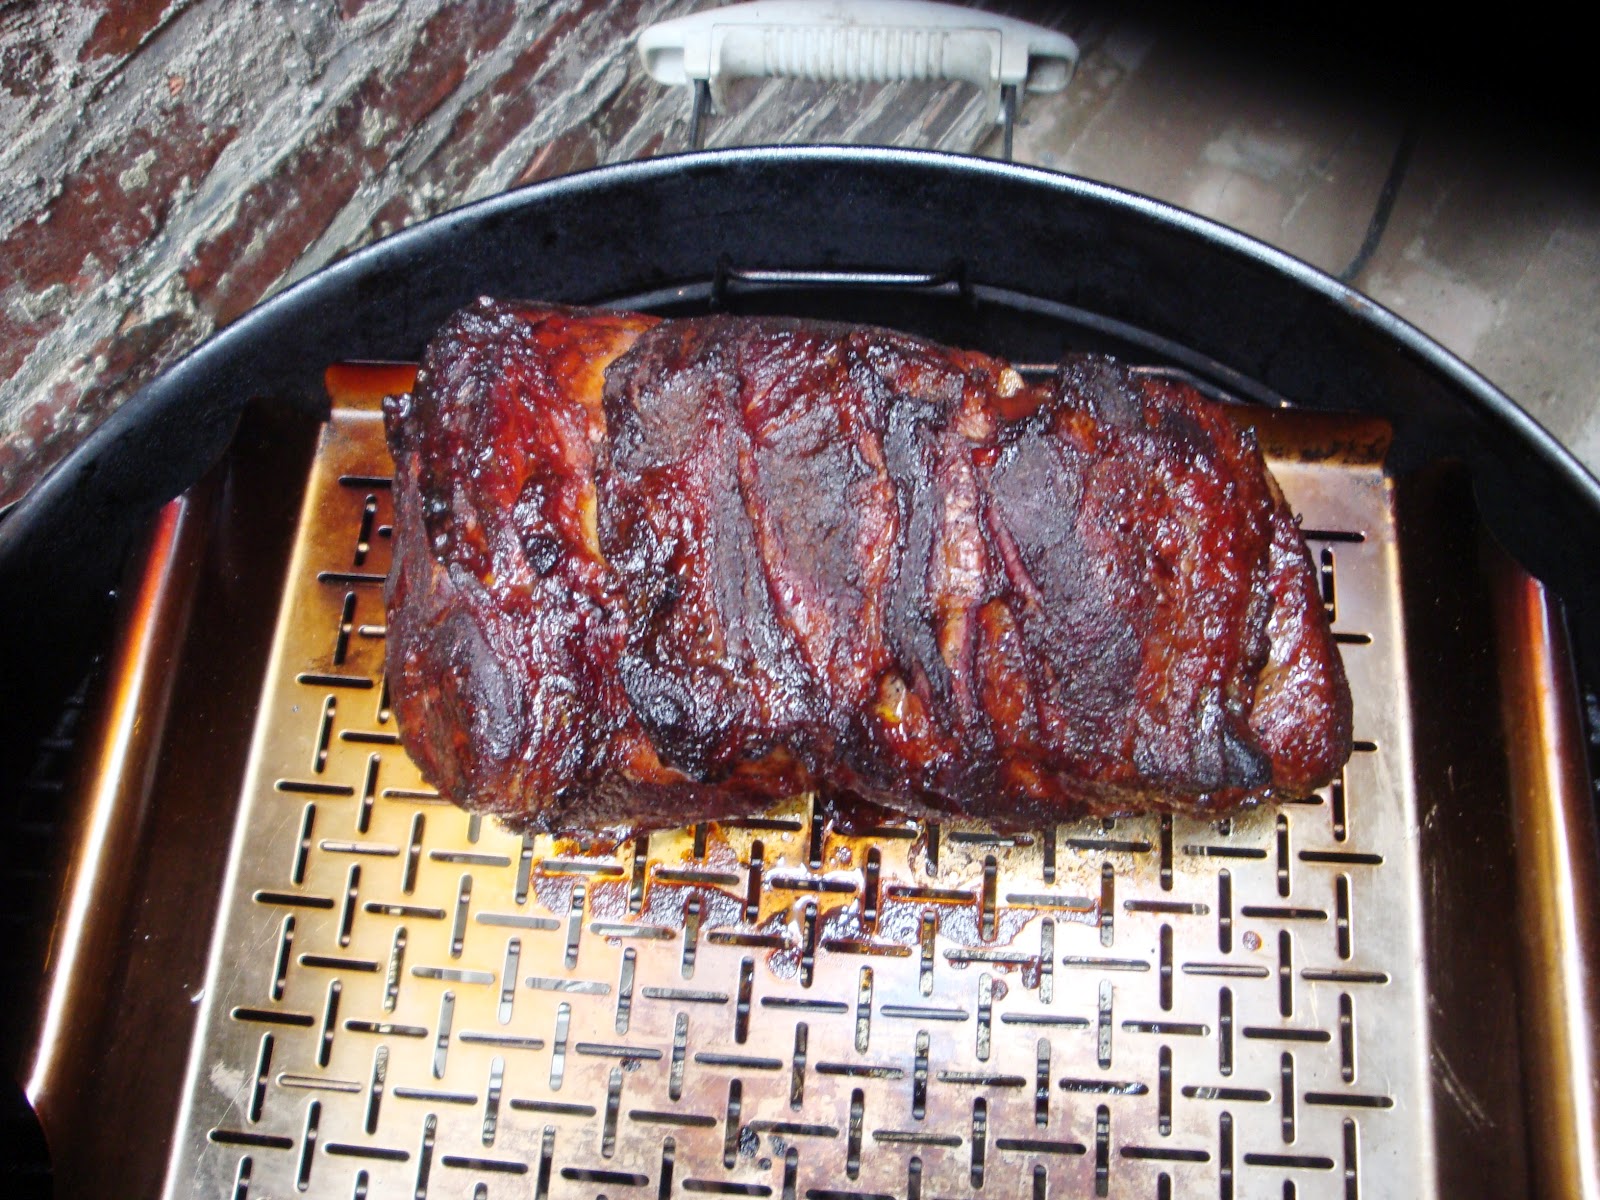
(See that pink ring around the edge of the brisket? That's how you know the smoke has penetrated just enough to give it great smoke flavor, without adding so much smoke that the meat gets bitter.)
 
14.    Serve it with your favorite barbecue sauce – on a bun or straight up – and enjoy!

(Served here with gooey, cheesy grilled macaroni and cheese)

Try it with You Can Grill That’s Dr. Pepper Sauce, Ketchup and Molasses Sauce, or even let your worlds collide with Texas-style beef brisket and Carolina-Style Mustard Sauce!

If you like this recipe, please be sure to click on the links below to share it! And don’t forget to follow @youcangrillthat on Twitter!

Monday, July 9, 2012

BBQ Pork – In 15 Minutes!

There’s nothing better than barbecue pork that’s been smoked, low and slow, for 10-12 hours, until it just falls off the bone and melts in your mouth. And if you’d like to smoke a pork shoulder (also known as a pork butt or a Boston butt) on your grill, click here to find out how.

But some days you’re craving delicious barbecue pork, and you don’t have 12 hours. You may not even have one hour. It may be 105 degrees outside, like it was in DC last weekend, and you just don’t want to spend that much time outside over a hot grill. So how do you satisfy that BBQ pork craving?

With this recipe, you can grill tender, juicy pork that’s packed with savory barbecue flavor, and you can have it in less than 15 minutes. Instead of using a whole pork shoulder, you can use bone-in pork shoulder steaks – it’s the same cut, just sliced. You use the same dry rub as you would for smoking a shoulder, grill the steaks for 6-7 minutes on each side, slice the meat, and serve it on a bun topped with your favorite barbecue sauce.


Of course, it’s not the same as “real” barbecue, but on those days when you have the craving but not the time, it’s a very worthy stand-in. So give it a try!

Ingredients (serves 6-8):

4 pork shoulder steaks, about 12 oz each

Dry rub ingredients:

½  cup brown sugar
2 tablespoons salt salt
1 tablespoon black pepper
½ tablespoon chili powder
½ tablespoon garlic powder
½ tablespoon onion salt

Directions:

1.    Mix all dry rub ingredients together. Rub generously over meat. Refrigerate for at least 2 hours.

 
2.    Soak some wood chips in water while your coals are getting hot. When the coals are ready to go, add the wood chips, then place the pork shoulder steaks over direct heat.
3.    Grill the steaks, covered, for 12-14 minutes, turning once.
4.    Remove the steaks from the grill and let rest for 5-10 minutes.

 
5.    Cut the pork into thin slices. Serve on a bun with your favorite sauce.


Give it a try with my ketchup and molasses sauce, Carolina-style mustard sauce, mango BBQ sauce, or my new personal favorite, Dr. Pepper BBQ sauce!

If you like this recipe, please be sure to click on the links below to share it! And don’t forget to follow @youcangrillthat on Twitter! 

Tuesday, July 3, 2012

Dr. Pepper BBQ Sauce

This Dr. Pepper barbecue sauce has just the right amount of sweet and heat. The Dr. Pepper flavor (or should I say, the 23 Dr. Pepper flavors) shines through without being overpowering. It goes great with grilled ribs, chicken, pork, pretty much anything, and it’s really easy to make – no chopping, no blending, just combine a bunch of ingredients you probably already have in your kitchen and simmer. So give it a try!

Ingredients:

½ stick butter
1 cup ketchup
1 can Dr. Pepper
½ cup cider vinegar
¼ cup Worcestershire sauce
½ cup brown sugar
½ teaspoon each of the following: salt, black pepper, garlic powder, onion salt
1 teaspoon red pepper flakes
2 TBSP lemon juice

Directions:

1.    Melt butter in saucepan over medium heat.
2.     Stir in all other ingredients.
3.    Simmer 30-40 minutes, until reduced. Enjoy!

If you like this recipe, please be sure to click on the links below to share it! And don’t forget to follow @youcangrillthat on Twitter! 

Monday, June 11, 2012

Beer Can Chicken – Indian Style!

This dish is a spicy, savory, Indian play on the classic beer can chicken.  The chicken is rubbed with a spicy, flavor-packed Indian dry rub, and then smoked on the grill over a can of beer.  The result is chicken that's crispy on the outside and incredibly moist on the inside.  It’s served with a coconut and curry sauce that’s sweet and savory, along with some zucchini and some lightly grilled flatbread to soak up all the extra sauce.

And besides, who doesn’t want to try a recipe when step one is, “Drink half a can of beer”?

 
Ingredients (serves 4):

1 can of beer
1 whole chicken (4 to 4 ½ pounds)
2 tablespoons olive oil
Salt and pepper
4 pieces flatbread

Indian dry rub:
3 TBSP curry powder
1 ½ TBSP coarse sea salt (substitute regular table salt if you don’t have sea salt)
2 TBSP red pepper flakes
1 TBSP ground cumin
1 TBSP ground coriander
½ TBSP dry mint
½ TBSP ground ginger

Coconut Curry Sauce with Zucchini:
1 onion, chopped
4 cloves garlic, minced
1 jalapeno chili, chopped
1 tsp lemon juice
2 TBSP olive oil
2 zucchinis, cut into bite-sized pieces (feel free to substitute other vegetables, like squash, carrots, etc.  Just be sure to adjust the cooking time as needed.)
¼ cup chicken broth
1 TBSP curry powder

Directions:

1.    Drink half a can of beer.
2.    Remove chicken giblets and rinse chicken inside and out.  Pat dry with paper towels – get it as dry as possible.
3.    Brush chicken with olive oil.  Sprinkle with salt and pepper.
4.    Combine dry rub ingredients, and coat chicken generously with the rub.


5.    Shove the beer can into the cavity of the chicken.
6.    Set up your grill so that the charcoal and some wood chips (pre-soaked in water to get the smoke going) are one side, and drip pan is on the other.
7.    Place the chicken on the opposite side of the grill from the coals, above the drip pan, so that it will cook indirectly.  Position the chicken so that the can and the two legs form a tripod to hold the chicken upright.
8.    Smoke the chicken, with the grill covered, for about an hour and fifteen minutes.  
9.    While the chicken is ready, go ahead and prep for your coconut curry sauce.  Puree the onion, garlic, jalapeno, and lemon juice in a food processor (or blender).
10.    When the temperature of the chicken reaches 165 degrees in the breast or 180 degrees in the thigh, and the juices run clear, remove the chicken and let rest for 10 minutes before carving.  This will give you time to put together your curry sauce.
11.    Place a cast iron pan on the grill directly above the coals.  Heat the olive oil.
12.    Add your pureed blend and stir for about 2 minutes.  Then add the zucchini and chicken broth and cook for another 2 minutes.  Stir in the curry powder, then the coconut milk, and cook until it begins to bubble.  Move the pan to the other side of the grill to simmer for about 10 minutes.


13.    Quickly heat the flatbread – about a minute on each side – while the sauce simmers.
14.    Remove the bread and sauce, serve with the chicken, and enjoy!

If you like this recipe, please be sure to click on the links below to share it! And don’t forget to follow @youcangrillthat on Twitter!

Tuesday, May 22, 2012

Fall-off-the-Bone Smoked Ribs on the Grill

Looking to make tender, juicy, fall-off-the-bone smoked baby back ribs on the grill?  Give this recipe a try - you won't regret it!


Ingredients (serves 4):

1 rack baby back ribs
Ketchup and molasses BBQ sauce (or whatever sauce you prefer)

Dry rub:
1 cup brown sugar
2 tablespoons salt
1 tablespoon black pepper
1 tablespoon chili powder
1 teaspoon garlic powder
1 teaspoon onion salt
1 teaspoon red pepper flakes

Directions:

1.    At least one hour (and up to 24 hours) before you’re ready to cook, apply the dry rub.  First you’ll need to remove the membrane (a thin layer of skin on the bone side of the ribs). The easiest way to do this is to insert a dull kitchen knife between the membrane and the bone, then move it around to loosen the membrane away from the ribs. Once its loose, pull it off using your hands in one large piece.  Removing the membrane will help more of the dry rub and the smoke flavors get into the meat.
2.    Combine all dry rub ingredients and rub generously over ribs.  Keep in refrigerator until 30 minutes before cooking time. Remove from fridge and let sit for 30 minutes to reach room temperature.
3.    While ribs are sitting, heat about 16-20 pieces of charcoal in a chimney starter (here's the one I use) and soak some wood chunks in water.  Place the coals on one side of the grill.  Add the wood chunks to the coals a few minutes before you’re ready to start cooking. Place a drip pan on the other side of the grill, below where you'll put the ribs.
4.    Place the ribs on the opposite side of the grill from the coals and wood chunks in a rib rack (like this one) or bone-side down. Cover the grill, with the holes in the lid open and directly above the ribs to get a good smoke flow.
5.    Cook for three and a half hours, adding about 8-10 coals and another pre-soaked wood chunk every hour of grilling time.
6.    After three and a half hours, brush the meat with the BBQ sauce. Close lid and cook another 10 minutes, then remove ribs from grill.
7.    Let ribs rest for 10 minutes.
8.    Using a sharp knife, cut through the ribs between the bones.


9.    Toss the ribs in the sauce, serve and enjoy.

If you like this recipe, please be sure to click on the links below to share it! And don’t forget to follow @youcangrillthat on Twitter! 

Sunday, April 22, 2012

Mango BBQ Sauce

Looking for a sauce that’s a little sweet, a little hot, and really tangy?  Take your taste buds on a tropical vacation with this recipe for mango barbecue sauce!

Goes great with chicken, ribs, or this recipe for pork shoulder smoked on the grill.

Ingredients:

¼ cup oil (canola or olive)
1 small yellow onion, diced
3 cloves garlic, minced
½ teaspoon fennel seeds
1 teaspoon salt
1 teaspoon black pepper
1/3 cup apple cider vinegar
1/3 cup molasses
2 tablespoons Worcestershire sauce
2 tablespoons lime juice
1 serrano pepper, chopped
½ teaspoon ground cumin
1 tablespoon ground ginger
1 mango, chopped

Directions:

1.    Heat oil in saucepan over medium heat.
2.    Add onions, garlic, Serrano pepper.  Cook until onions are translucent.
3.    Add fennel seeds, cook one minute.
4.    Add all other ingredients except mango, cook four minutes.
5.    Pour into food processor with chopped mango and puree until smooth.
6.    Enjoy over BBQ pork, chicken, or ribs.

If you like this recipe, please be sure to click on the links below to share it! And don’t forget to follow @youcangrillthat on Twitter! 

Sunday, April 15, 2012

Ketchup and Molasses BBQ Sauce

Everyone has their own idea of the perfect BBQ sauce.  I’m not here to weigh in on those regional and statewide debates.  But if you’re looking for a classic barbeque sauce, I think this fits the bill.  It’s ketchup and molasses-based, with apple cider vinegar and a host of other flavors.  Try it with this recipe for smoked pork shoulder on the grill, and even give it a taste test by comparing to this recipe for Carolina-style mustard-based sauce.

  
Ingredients:

¼ cup butter
1 medium onion, minced
2 garlic cloves, minced
2 tablespoons olive oil
½ cup ketchup
¼ lemon juice
½ cup cider vinegar
½ cup molasses
1/3 cup Worcestershire sauce
½ cup loosely packed brown sugar
1 tablespoon hot sauce
1 teaspoon salt
1 teaspoon pepper

Directions:

1.    In saucepan over medium heat, melt butter.
2.    Add onion and garlic.  Cook 3-4 minutes, until onions are translucent. 
3.    Add all other ingredients.  Bring to a simmer. 
4.    Taste and adjust flavor to your preference.
5.    Cook down for about 20 minutes on low heat, stirring frequently.
6.    Remove from heat.  Serve immediately, or refrigerate and then reheat and serve when you’re ready.

If you like this recipe, please be sure to click on the links below to share it! And don’t forget to follow @youcangrillthat on Twitter! 

Carolina-Style Mustard-Based BBQ Sauce

From the Carolinas to Kansas (aka, the BBQ belt), everybody has their own preference on barbeque sauce, and where you’re from plays a huge factor in what you like.  Mustard-based sauces are typically associated with my home state of South Carolina, but in fact, this sweet-and-spicy treat isn’t the preferred sauce statewide.  It finds its home in Columbia, and it’s popular throughout the midlands and lowcountry.


Here’s my take, after a little trial and error, on Carolina-style, mustard-based sauce.  Try it with this recipe for smoked pork shoulder on the grill, and cook it alongside this ketchup-and-molasses-based sauce for a little regional taste test!

Ingredients:

¼ cup butter
1 cup mustard
½ cup loosely packed brown sugar
½ cup cider vinegar
¼ cup Worcestershire sauce
1 tablespoon hot sauce
1 teaspoon onion salt
 2 teaspoons salt
1 teaspoon pepper
¼ cup honey

Directions:

1.    In saucepan over medium heat, melt better.
2.    Slowly stir in all other ingredients. Using a whisk is easiest.  Bring to a simmer.
3.    Give it a taste.  If you want it sweeter, add honey or brown sugar.  Hotter?  Add sauce or pepper.  Saltier?  Do I really have to tell you what to do?
4.    Let simmer for 3-4 minutes, remove from heat.
5.    Enjoy right away, or refrigerate and reheat when ready to serve.

If you like this recipe, please be sure to click on the links below to share it! And don’t forget to follow @youcangrillthat on Twitter! 

Holy Smokes! How to Smoke BBQ Pork on the Grill

Those of us raised in the south know that barbeque is barbeque and grilling is grilling, and never the twain shall meet.  Ok, maybe “never” is a bit strong. 

In fact, you can barbeque pork on the grill, but the principles of BBQ stay the same.  Say it with me, LOW AND SLOW.  The key to smoking pork on the grill – in this recipe, a pork shoulder – is to keep the temperature constant and low while the meat reaches fall-off-the-bone status.  And if you follow this recipe for smoked pork shoulder on the grill, fall off the bone it shall.  Try it with ketchup-and-molasses-based sauce, Columbia, SC-mustard-based sauce, Dr. Pepper sauce, or Cherry Cola Sauce. Dig in!


Prep time: 10 minutes.  Cooking time: 10-12 hours

Ingredients:

Pork shoulder (allow 1 pound per person)

Dry rub ingredients:

1 cup brown sugar
1/4 cup salt
2 tablespoons black pepper
1/2 tablespoon cayenne pepper
1 tablespoon garlic powder
1 tablespoon onion salt
2 tablespoons paprika

Directions:

1.    The day before you’re planning to smoke your pork shoulder, combine all dry run ingredients in a bowl.  Rub generously over meat, cover, and refrigerate.


2.    The day you’re planning to cook, set your alarm early!  It’s going to take about 12 hours total time.
3.    First thing, take the pork out of the fridge.  Then start soaking your wood chunks (or chips, though chunks are better) in water.  TIP: Toss a little apple cider vinegar in the water.  Then light your about 16 pieces of charcoal in a chimney starter.
4.    When the charcoal is ready, place it on the far end of the grill, in a charcoal holder if you have one (or a neat pile if you don’t).  Put a handful of wood chunks/chips over the charcoal.  The wood will give you your smoke, which is key for the flavor.


5.    On the other side, place a drip pan, with a little bit of apple cider vinegar poured in the bottom of the pan, lime so:


6.    Place the pork shoulder onto a grilling grate, and place the grate above the drip pan.  Your set up should look like this:

  
7.    Place the cover over the grill, with the holes above the meat, opposite the coal.  Make sure the holes on the cover and the bottom of the grill are open.  This should get some good smoke going!
8.    Now comes the hard part.  To maintain a constant, low temperature (you want to keep it as close to 225 degrees as possible), you’re going to need to keep about 12-15 lit charcoals going at all times, so you need to replace the coals every 60-90 minutes.  But you need to add coals that are already lit.  So every hour or so, light 12-15 new coals in the chimney starter.  Once they’re ready, add them to the grill. 
9.    For the first 3-4 hours, you should also add (pre-soaked) wood chunks/chips every 60 minutes to keep the smoke going.
10.    At about 3 hours (or closer to 4 if it’s a large shoulder), your meat will have a nice, black crust, like so:


11.    At this point, it won’t be able to take in any more smoke, so go ahead and wrap it in thick aluminum foil, and don’t bother adding wood chunks for the rest of the cooking time.  Just keep adding new coal as needed.
12.    When the shoulder reaches an interior temperature of 190 degrees, remove the pork from the grill.  Let rest for 30 minutes in foil.
13.    Open:


14.    Pull apart and enjoy!


If you like this recipe, please be sure to click on the links below to share it! And don’t forget to follow @youcangrillthat on Twitter!